Here’s a Fall dollar store decor project! You remember those gold plastic chargers from Dollar Tree that I painted for Spring? Let's do it again for Fall!
This post may contain affiliate links, which means if you make a purchase through them I receive a small percentage at no extra cost to you (read my full disclosure).
Let's make DIY pumpkin chargers for a Fall Table!
This project is part of the New Again series that I've been doing every month with Jen from Noting Grace, Libbie from A Life Unfolding, Leen from Sand Dollar Lane and Brooke from Cribbs Style. We each pick something to redo and give a new life to. Make sure to see the links at the end of this post to see what they made New Again!
Those painted Sparrow chargers I did for Spring really took off on Pinterest and TikTok, mostly because younger people were confused about what chargers were!
Many commented that they couldn't understand how you can eat off of painted plates.
Some commented that they thought I was going to paint phone chargers!
Click on the Pin or the TikTok to read the funny comments!
@therootsofhome Dollar Store DIY! ##BiggerIsBetter ##dinnerparty ##helloSpring ##homediy ##stepbystep ##dollartreediy ##diyhomedecor ##dollartreehomedecor ##tiktokdiy
♬ Drive Forever - Remix - Sergio Valentino
To clarify, chargers are larger decorative plates that are placed beneath the plates that will hold the food.
They are usually considered to be part of a formal table setting, with the charger being left in place as each course is served on a new plate laid on the charger...
but lately I've been using them on more casual tables.
They are just meant to add a decorative layer.
No food is supposed to come in contact with them, so it's ok that these are painted.
Also please don't attempt to plug your phone into them.
So here's where we start again, those gold plastic Dollar Tree chargers.


Y'all! I found the best set of Fall stencils on Amazon for projects!

The one I had in mind for this project is the pumpkin.
If you remember, when I first did this project for Spring, I tried a couple of ways to paint the white base coat for the chargers.
First, I tried spray painting the chargers a glossy white but it was not drying quickly.
and I didn’t really like the glossy...
If you like a glossy finish, use spray paint!
What worked for the look I was going for is chalk paint.
I know not everyone is looking to do something DIY right now, so here are some pretty chargers that already done. And here are so many cute options!
This is the method that worked for me for this project!
Here's Everything I Used:
- Gold plastic chargers (from Dollar Tree)
- White chalk paint
- Pumpkin stencil
- Paint brushes
- Waverly "pumpkin" colored chalk paint
- Waverly "scallion" colored chalk paint
- Clear topcoat in matte finish
Here's How I did it:
First, I gave the chargers two coats of chalk paint.


To get the paint all around the decorative edge of the charger, I brushed from the edge toward the middle.
Then I trimmed the stencil just a little to make it fit the bottom of the charger and lay flat.

Then I placed the stencil in the center of the charger.

I used Waverly chalk craft paint to paint the stencil, but acrylic craft paint in the color you like will do just as well.
I used the color Pumpkin for the pumpkin : )


I used just a small amount of paint on the brush, almost a dry brush.
If the brush has too much paint on it, the paint will run under the stencil and ruin the design.

Then I painted the stem and leaves with the Scallion color.


Since it was such a light coat of paint, I went back over it with a second light coat of each color right away without moving the stencil.

Then I carefully pulled up the stencil.


If there was wet paint on either side of the stencil after that, I wiped it off before moving to the next charger to avoid any smears.
If there were any little smears or smudges of orange or green paint, I just touched it up with a little bit of the white chalk paint.
After all of the paint was dry, which didn’t take long at all, I gave each charger a coat of matte clear finish spray. This dried fairly quickly.

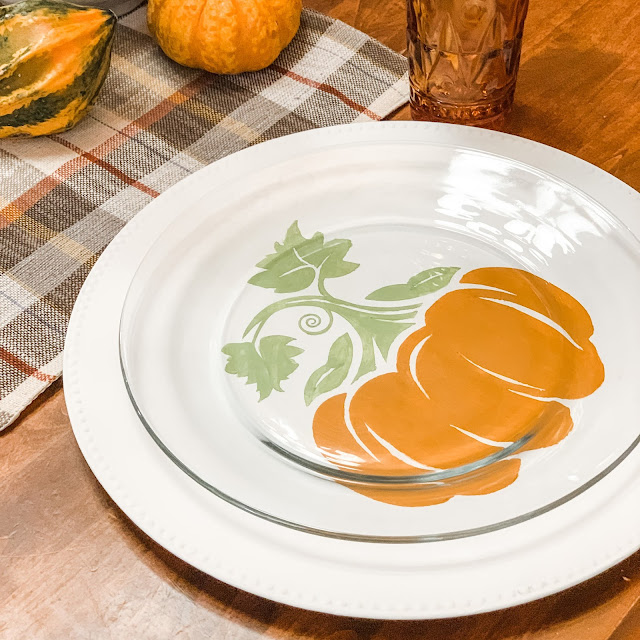
The chargers look so cute topped with a clear plate! I was really happy with how they turned out.


If this seems like too much to tackle right now, there are options to buy super cute chargers here.
New Again