in
DIY
Hello! I wanted to give a little update on what we've been working on around here lately. You may remember we had begun demolition in the bathroom in the mother-in-law apartment attached to our house just before the hurricane hit. You can see all of the before photos here at One Room Challenge | Week 1 | Before's and Plans.
We are still waiting to proceed with flood-related repairs, so we've switched back over to the bathroom for a while. Sometimes I kind of like to work on several projects at once. It helps with my project ADD! So now that we are back to work on the bathroom, we finished the demolition.
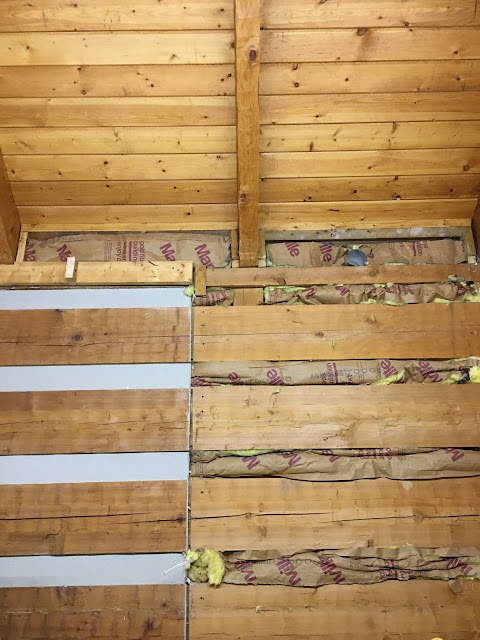
We had already removed the tub and shower insert. We relocated the vent pipe that ran above the ceiling and removed the exhaust fan. Then we took down the ceiling, exposing the beams and tongue and groove above.
Removing that ceiling has made such an impact. The space is the same size but the volume added makes it feel so much larger and more open.
Then we framed a new wall to partition off the space above the hallway outside the bathroom. This is where we will be relocating the air handler for the apartment HVAC system soon. We also relocated a lot of the electrical wiring, switches, and lighting.
Because we had removed so much drywall to get to the plumbing and the drywall that remained was either damaged or had wall paper on it, we decided to pull it all out and start over with new drywall throughout the room.
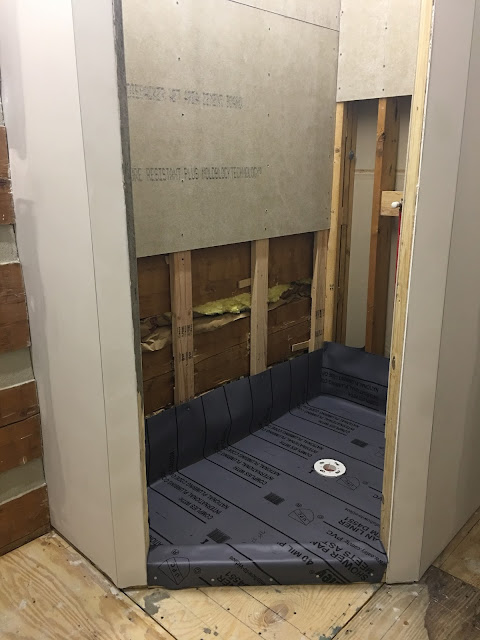
Then we framed in 6'-6" high walls for the new corner shower. My original design changed a little and instead of a doorway on the end, we made an angled wall for the door. It helped keep the floor plan more open.
So there's our progress so far! We're moving along slowly but surely! Thanks for following along on our renovation journey. Hopefully soon it will start getting pretty!
We are still waiting to proceed with flood-related repairs, so we've switched back over to the bathroom for a while. Sometimes I kind of like to work on several projects at once. It helps with my project ADD! So now that we are back to work on the bathroom, we finished the demolition.
We had already removed the tub and shower insert. We relocated the vent pipe that ran above the ceiling and removed the exhaust fan. Then we took down the ceiling, exposing the beams and tongue and groove above.
Removing that ceiling has made such an impact. The space is the same size but the volume added makes it feel so much larger and more open.
Then we framed a new wall to partition off the space above the hallway outside the bathroom. This is where we will be relocating the air handler for the apartment HVAC system soon. We also relocated a lot of the electrical wiring, switches, and lighting.
Because we had removed so much drywall to get to the plumbing and the drywall that remained was either damaged or had wall paper on it, we decided to pull it all out and start over with new drywall throughout the room.
Then we framed in 6'-6" high walls for the new corner shower. My original design changed a little and instead of a doorway on the end, we made an angled wall for the door. It helped keep the floor plan more open.
We used cement boards for the shower walls and built the shower drain pan. I have no tutorial or words of wisdom for this part because we are by no means experts. We watched a lot of tutorial videos and followed the manufacturer's instructions. My hubby did a great job on the shower pan!
So there's our progress so far! We're moving along slowly but surely! Thanks for following along on our renovation journey. Hopefully soon it will start getting pretty!
It's no secret that I love natural wood. You can't live in a log house without being able to appreciate the beauty of wood grai...
Subscribe to:
Posts (Atom)


