This is the easiest Fall DIY craft ever! Here's a way to upcycle a thrifted metal serving tray.
Yall! This is the easiest diy wreath ever! I’m almost embarrassed to blog about it because it’s so simple.
Don’t laugh when I share this Fall wreath I created.
I know it’s simple and easy.
But that’s the whole point!
We love simple, fast, and easy around here.
You can create a beautiful custom wreath in about 5 minutes using this trick.
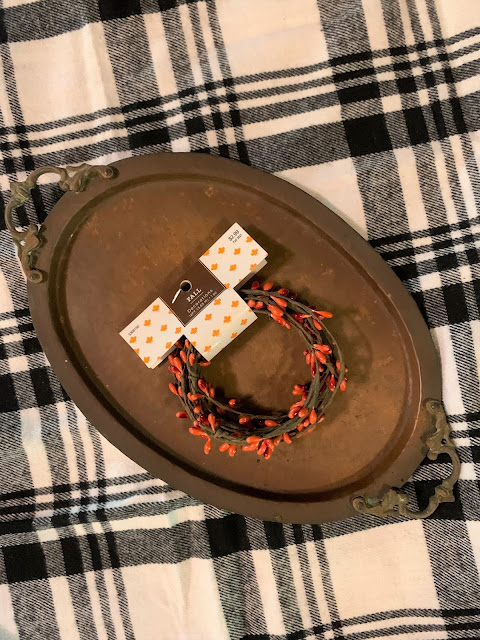
Find a tray.
Here's Everything I Used:
Serving Tray
Simple Garland
That's it.
The tray can be made from any material.
The one I used is copper.
My favorite way to find a tray for this is to thrift it (of course!)
Metal trays are usually super easy to find for just a few dollars in the thrift shops I go to.
Not many people seem to want silver plates trays anymore, especially tarnished ones, so they are always a good find.
If you can find a tole or painted tray for this project, it would add even more color and interest.
If the tray has handles this will be an even easier project!
Next, find a simple garland.
We aren’t looking for one of the big fluffy Fall garlands full of flowers and pumpkins and pine cones.
We want something simple and not too full or heavy.
Like this little one I picked up at Hobby Lobby to go with my copper tray.
I also saw some simple Fall leaf garlands at Dollar Tree that would work.
The main thing is you want a simple garland that is not too full.
That’s actually a good thing because they are usually so much less expensive than the super full garlands.
Pick a garland with colors that make you happy!
So here’s how to make a DIY metal serving tray wreath for Fall:
Attach the end of your wreath to the back edge of the tray.
If your tray has handles, just wrap the end securely through the handle.
If your tray does not have handles, find a spot on the back edge of the tray and hot glue or tape the end of the garland to it.
Next, loosely wrap the garland around the tray.
Again, if the tray has handles this part is super easy.
Let the garland flow behind, around, and in front of the tray to keep it in place.
When you reach the end of the garland, secure it by tucking it into and around another loop of the garland. It could also be hot glued or taped to the back edge of the tray.
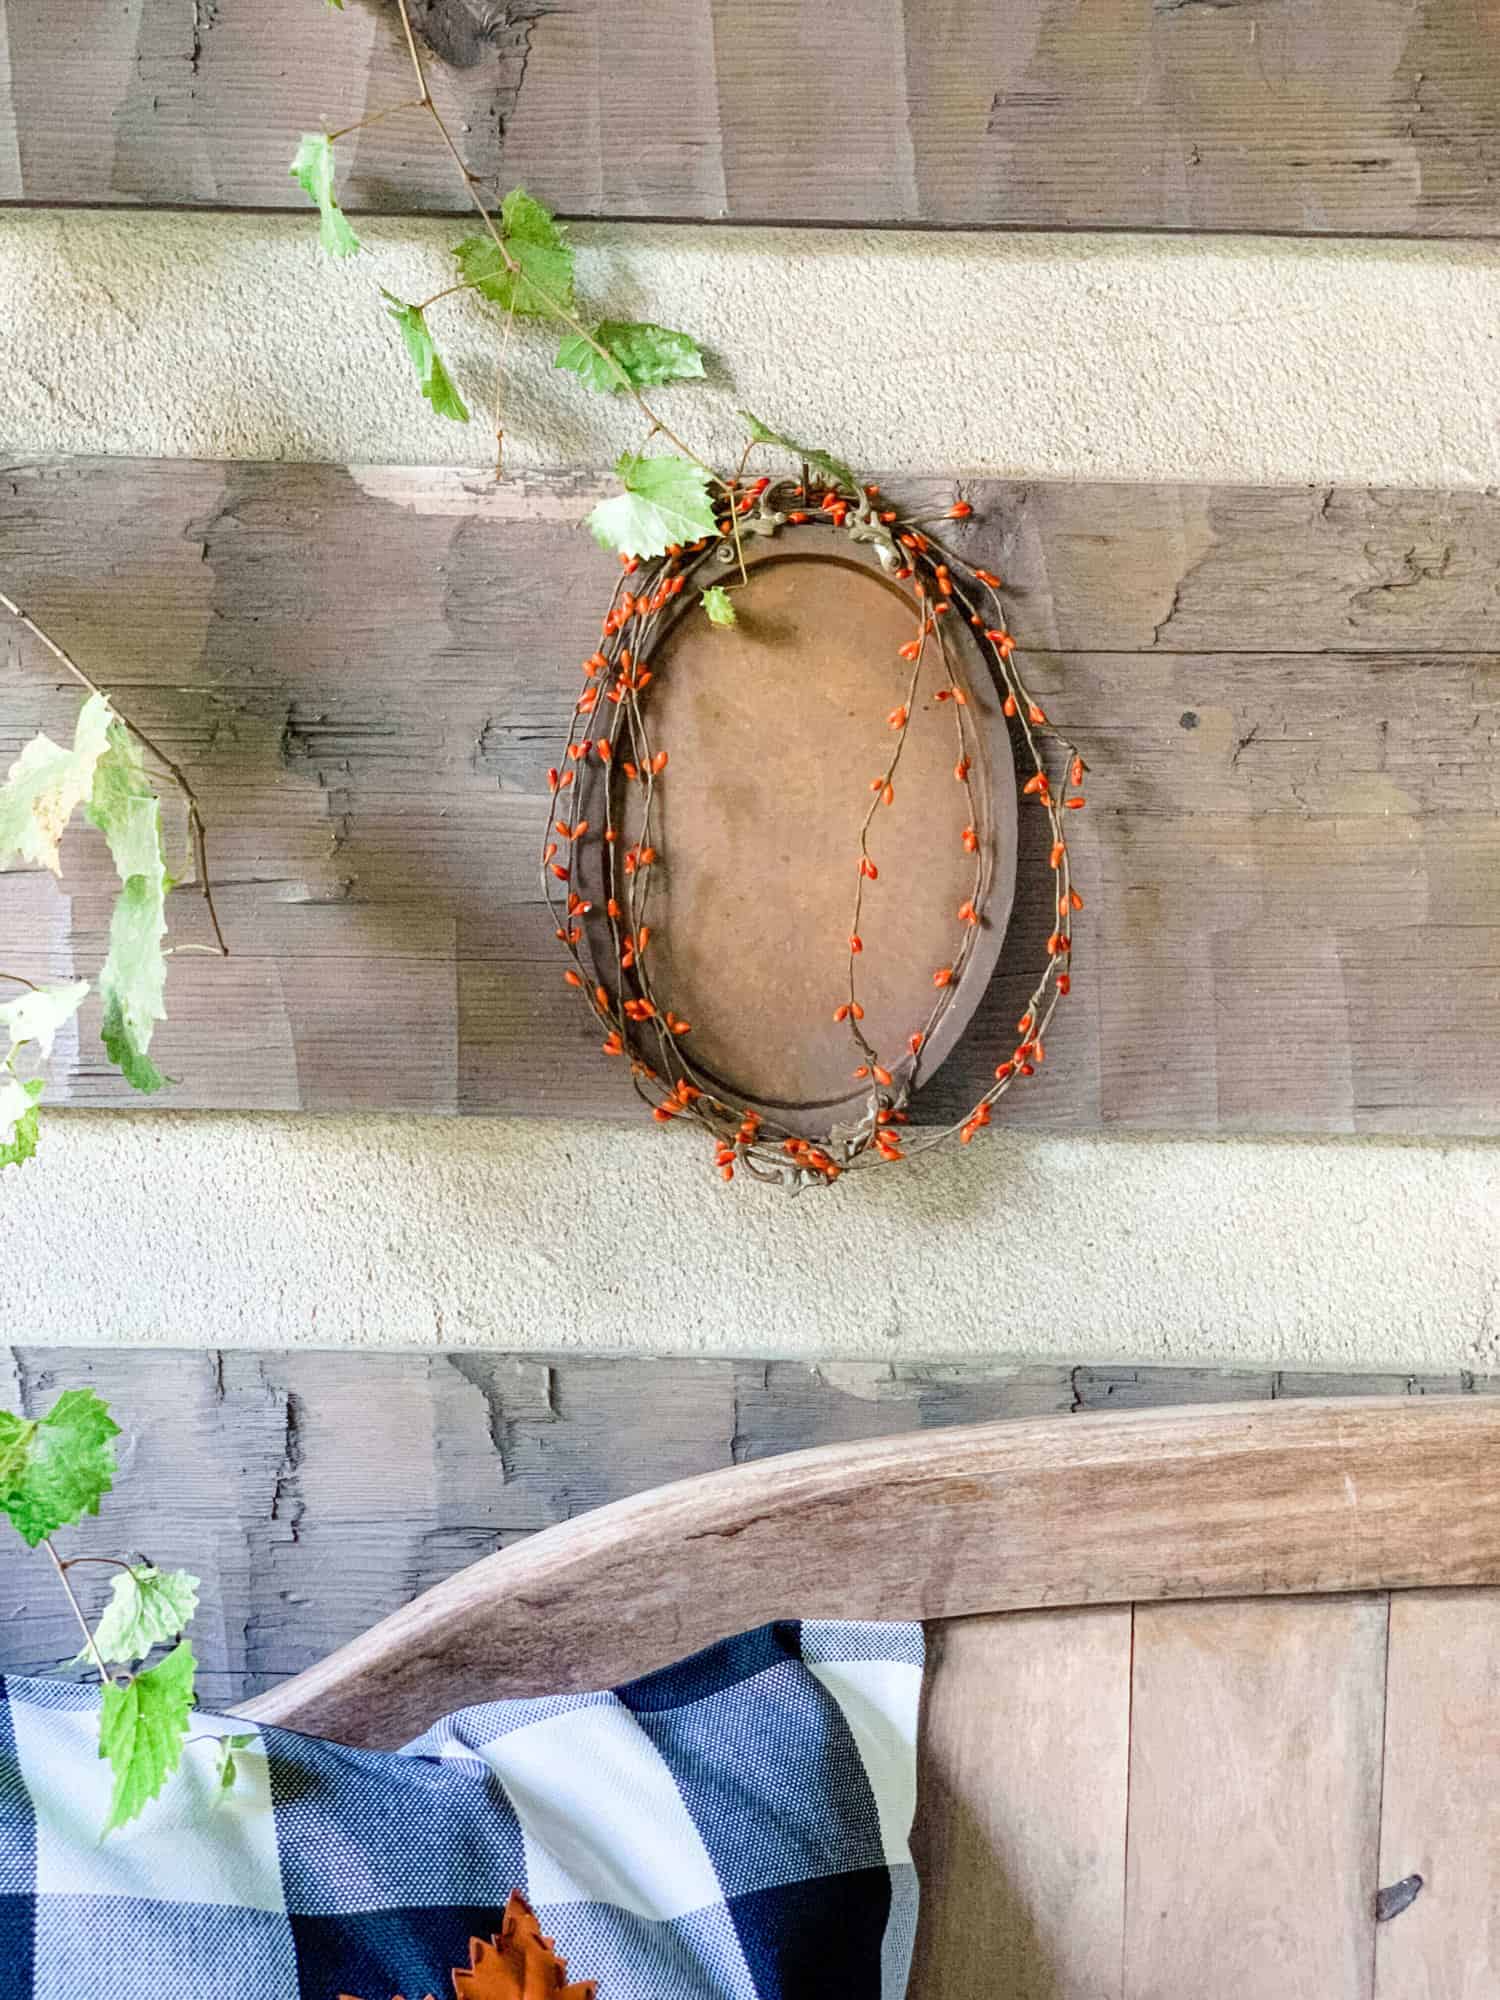
How to Hang a Metal Tray Wreath
To hang the metal tray wreath, again this is easiest if you have handles on the tray.
I have log walls so I just hung it by the handle on a nail.
If you have a handle, you can use a length of ribbon through the handle.
If there are no handles, there are several options to hang the wreath:
My favorite way to hang light weight trays is to use two Command strips and a short length of cord.
Tie a knot in each end and let them hang below the command strip. Place the second Command strip down on the first one and press them together.
Other options would be attaching a similar cord to the back of the tray with heavy duty duct tape or super glue.
You could also use an Adhesive Plate Hanger, or more than one of it doesn’t feel sturdy.
For a heavier tray, it may be best to loop ribbon or cording around the tray and tie a loop at the top to hang it from.
I hope all of that made sense!
Thanks for stopping by to check out my easy Fall DIY wreath with a metal serving tray.
Now please check out what my blogging besties have made New Again!