When it comes to thrifting, usually I would rather find a piece that is solid but in need of some work instead of something in pristine condition. Mainly because things that need work are cheaper! Here's how I fixed up a rusty antique wrought iron floor lamp.
updated 3/1/22
For $4.99 at my local Goodwill, this antique wrought iron floor lamp was definitely a bargain!
I loved its simplicity.
And it was perfect to add some height in the space I wanted it for.
But the whole lamp was pretty rusty, especially this top part.
But I knew this was an easy fix...
I hope you'll take a minute to check out some of our other lighting posts:
DIY Anthropologie Inspired Tasseled Lamp Shade
Add Crystals to a Rustic Outdoor Chandelier
15 Fantastic Rustic Glam Chandeliers
...here's how I fixed this wrought iron floor lamp up.
Wrought Iron Floor Lamp Makeover: Materials
Wrought Iron Floor Lamp Makeover: Instructions
To start off, I used a small wire brush to clean off the chunky parts of the rust.
Then I wiped the entire lamp down with a rag to clean it well.
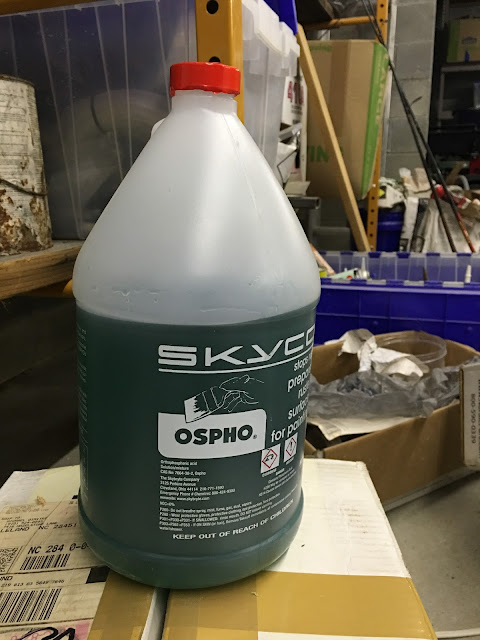
Next, because we work with a lot of metal around here and already have this rust inhibitor called Ospho on hand, I used it to stop the rust.
(You could try to skip this part if you want. I wanted to make sure the rust didn't come back through the paint.)
I put some Ospho in a spray bottle and gave the whole piece a good coat (wearing protective eyewear and gloves). Alternatively it could be brushed on, too.
I let it dry overnight (I moved it inside, out of the humidity.)
The next day the rust had turned into this white powder, which I cleaned off with a rag.
At this point, evaluate your metal condition. Run your hand over it. If the rust ate down into the metal enough to make it feel rough, you may want to sand it a little with 220 grit sandpaper to smooth it.
Mine didn't need sanding.
Lastly, I taped off the knob and then the whole lamp and cord got two nice coats of my go-to flat black paint, Rust-Oleum Flat Protective Enamel.
I did paint the yellowed light bulb socket black too. I didn't like the discoloration it had.
It would also be fun to try other colors of spray paint on this lamp! Whatever matches your decor best!
My Spray Painting Tip: When I'm painting a light bulb base I roll up a paper towel and shove it in the socket so paint doesn't overspray inside it.
I am really pleased with the smoothness of the finish.
I decided to keep it simple and used an LED Edison bulb instead of adding a shade.
For now it's living in a corner of my husband's newly redone home office space. You can see the rest of this room and how we made it over on a budget here One Room Challenge [Modern Rustic Home Office] Week 6 Final Reveal
Thanks for checking out my lamp makeover! I'm excited to be part of a blog hop featuring 19 thrifted items that have been given a makeover! Check out the creative projects that the rest of the bloggers in our blog hop have shared:


