

Make this super simple woodland DIY faux hanging moss wall art piece with me!
This post may contain affiliate links, which means if you make a purchase through them I receive a small percentage at no extra cost to you (read my full disclosure).
I wanted to fill this space over a bed that didn't have a headboard. After pondering the look, I decided I wanted something that looked natural like moss. At Hobby Lobby, I found the perfect greenery garland for this project! The were on sale, so a great deal. There were several garlands that could have worked for this project. I chose one that looked like hanging moss.


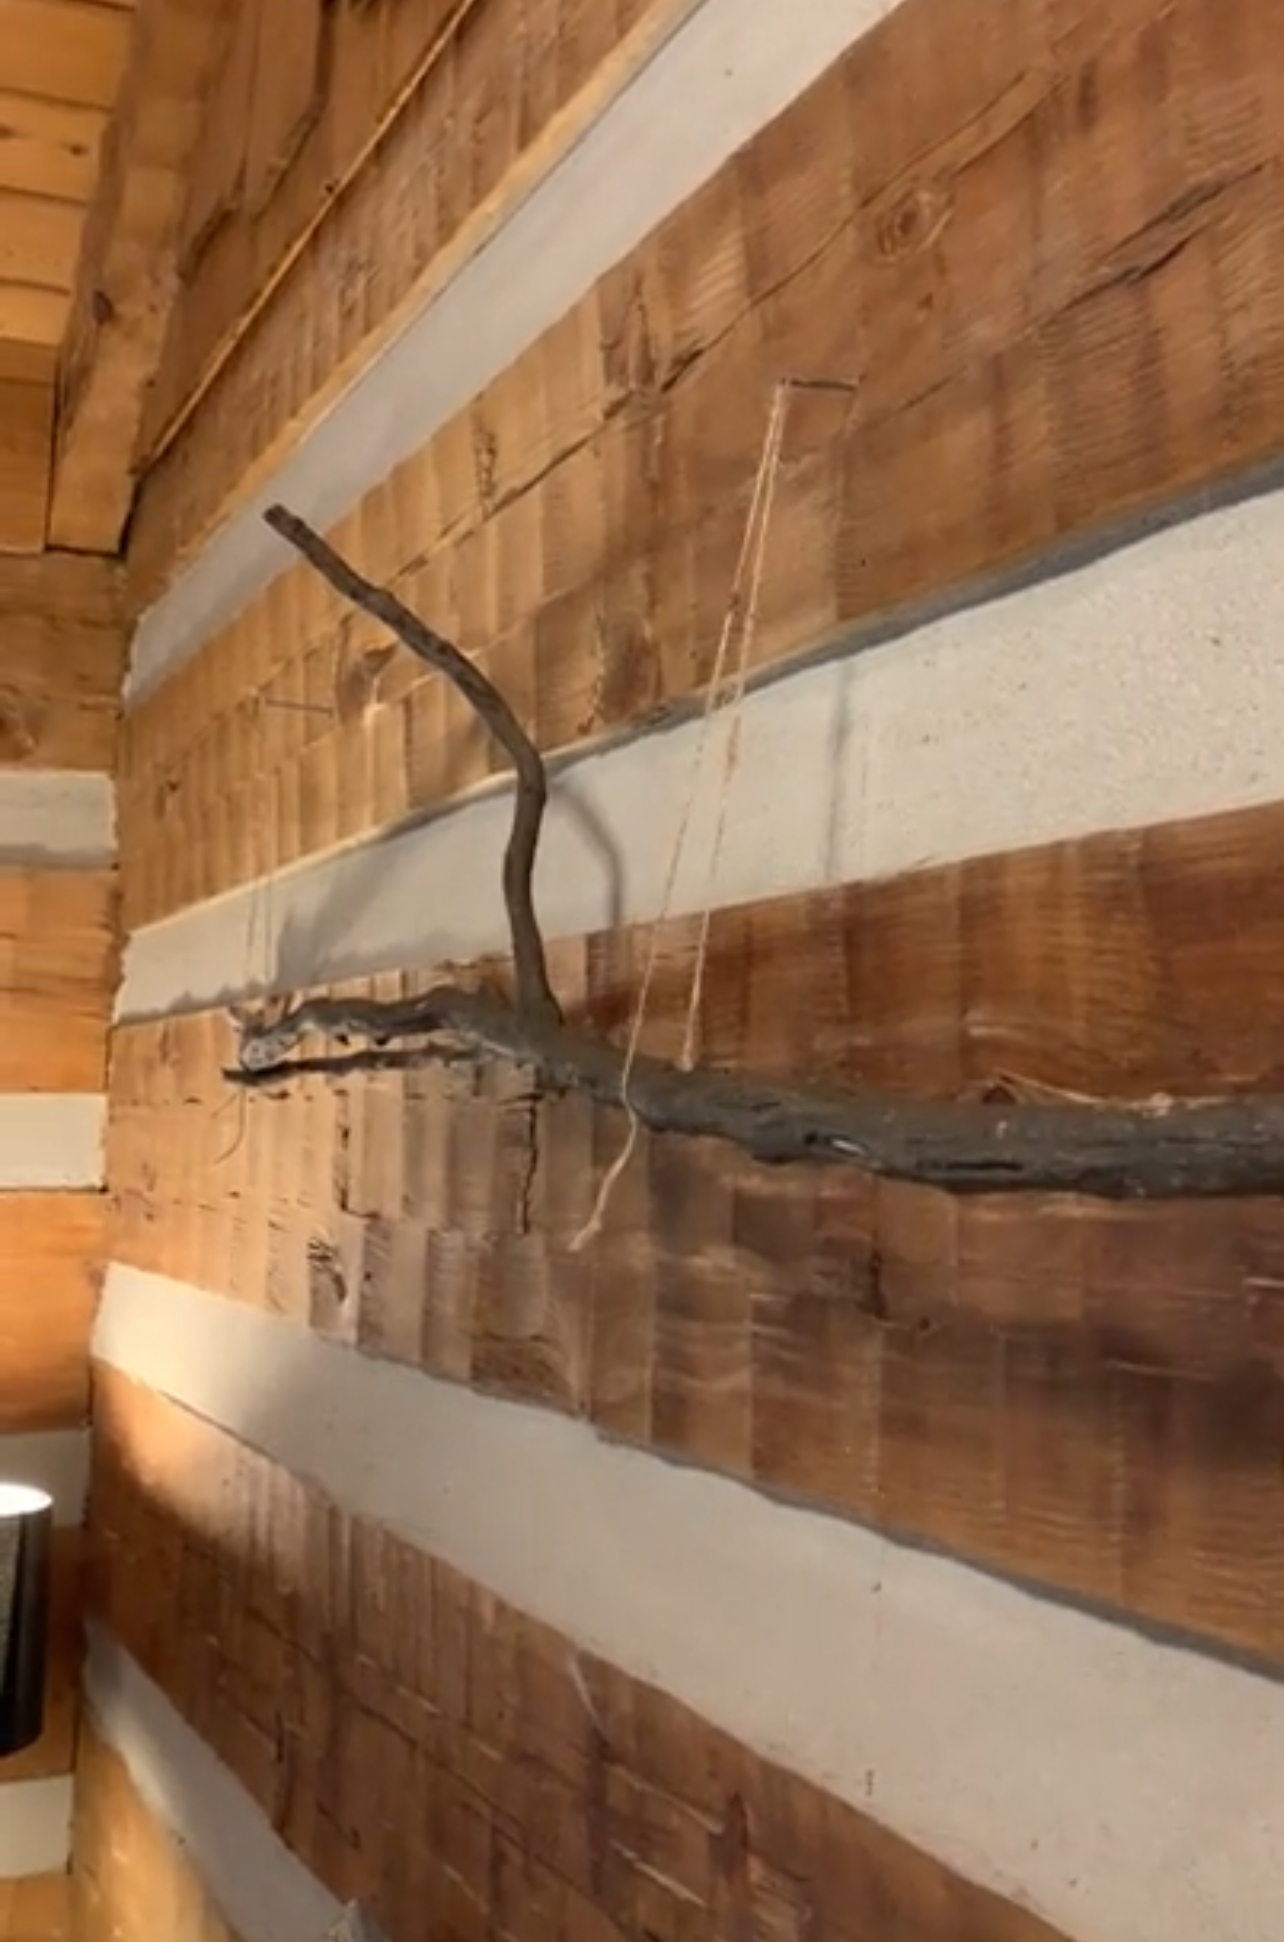
I used a branch that I found in our woods for the base, but I know not everyone can do that. I found a good faux branch replacement though.
I have log walls, which are easy to just nail into without having to find studs. I'll include an alternate way to hang the branch from a wall.
Here's Everything I Used:
- Tree branch (5' long or longer) This one is a good faux option
- 2 - greenery garlands
- 2 - 2" long nails or small decorative hooks with sloped nails
- Jute twine
- Scissors
Here's How I did it:
First, I nailed two nails about 4' apart into my wall. If I had been installing this on a drywall wall, I would have used these hooks or something like them.

Next, I cut the twine to the length I wanted it to hang down and tied it to the nail head with a knot and to under the branch with a knot.
Then I draped the faux moss over the branch. I draped a few on the back side of the branch here and there to anchor it to the branch.
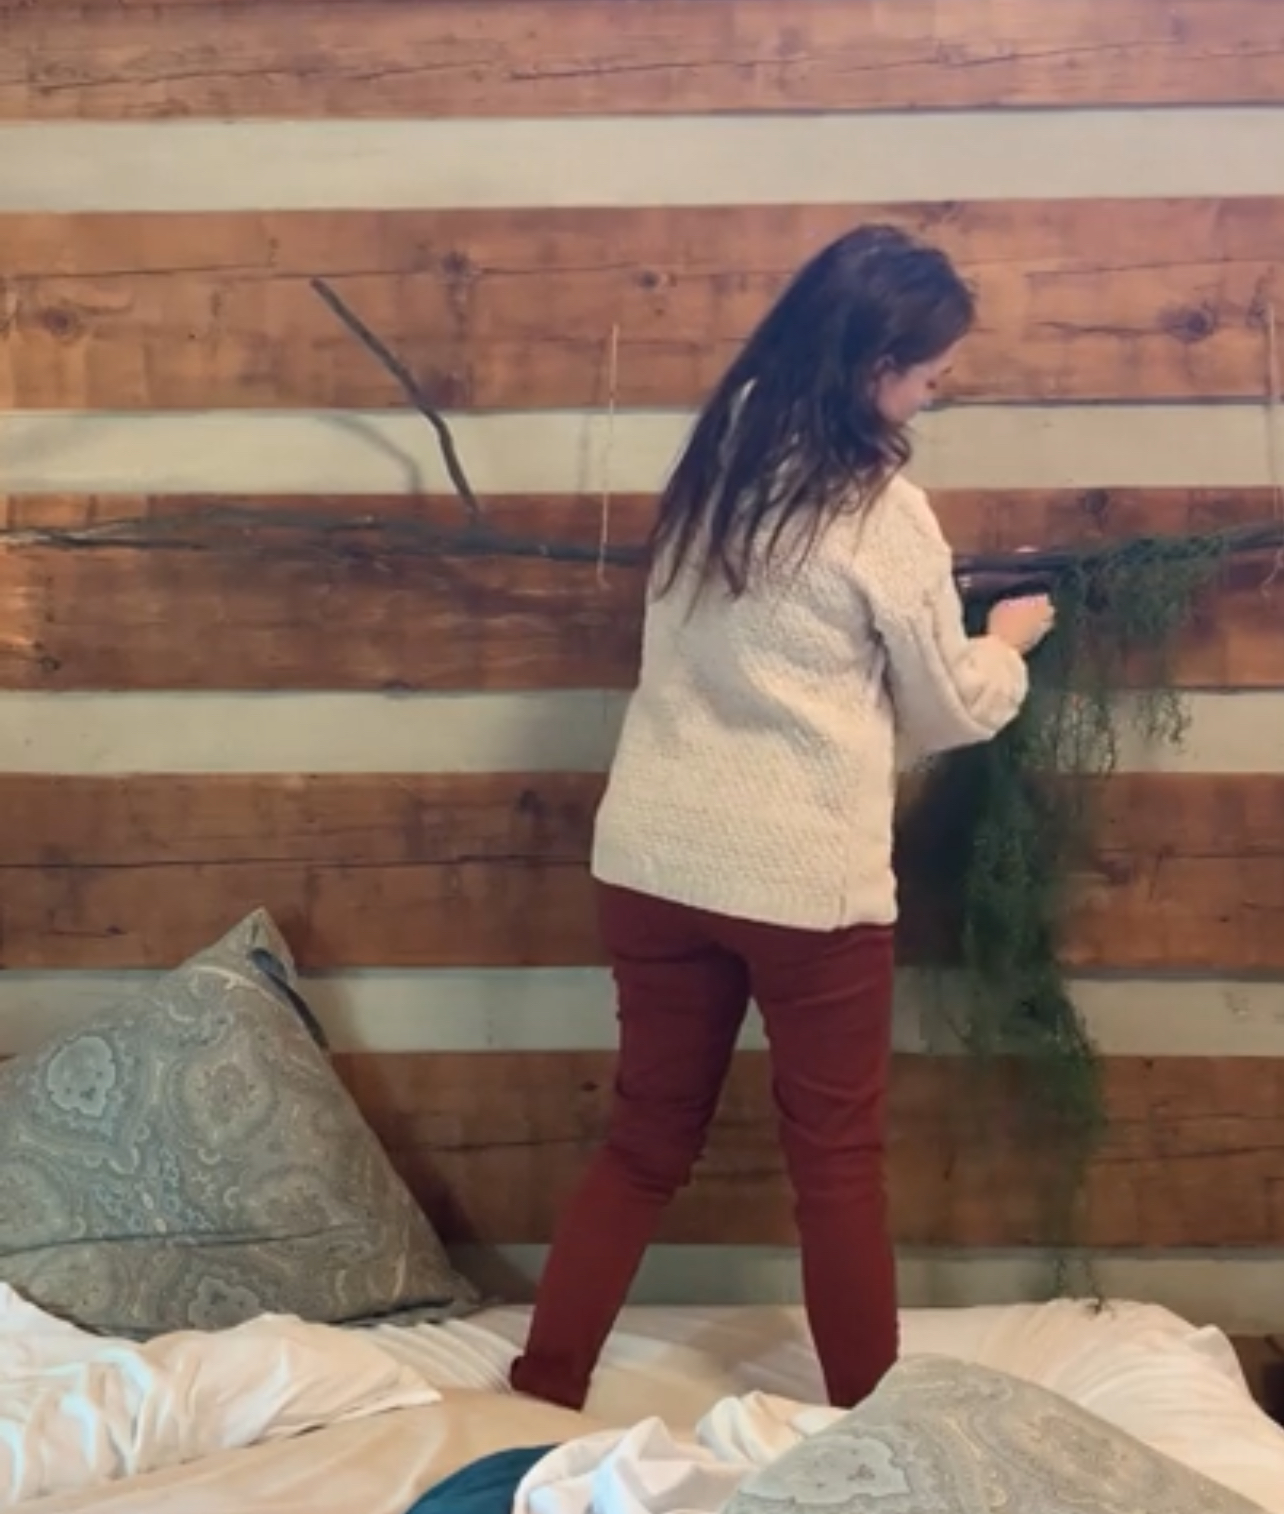

And that's it! Like I said, this was a super simple and fast little project. I really liked the rustic woodland look it brought to the room.


.png)

.png)